skip to main |
skip to sidebar
The second part of my daughter’s bedroom makeover features her dressing table.
A roadside find from many years ago, this piece of furniture has seen many coats of paint. It is one of those makeover stories, that taken out of context, will probably have many people liking the before better than the after.
In part one of this bedroom redo, I mentioned her previous room had been designed around a 20 year old blue and green Laura Ashley bedding ensemble from my college days. The dressing table was painted and stenciled (my one and only attempt at this technique) to match.
Since there was so much pattern and color in the rest of her room, I opted to paint and glaze the dressing table the same color as the curtain fabric - not very exciting when seen by itself but very fitting when seen with the rest of the room.
The dressing table includes the original hardware and a glass top which was custom cut to fit. It is paired with a metal chair I inherited from my Grandmother. The seat cover is pieced together from left over fabric from the bedding pillows.
Simple accessories including a bright pink jewelry box, a two tier silver tray purchased at a yard sale for $3, a vintage glove form from Ebay, and a display shelf above the mirror are all meant to keep my daughter’s things organized.
As you can see, one of the main goals of this project was to use things that were already in the room and fill in with inexpensive accessories. Next up is a DIY project for making inexpensive artwork. Hope you will come back to see it!
Sources:
Dressing table – roadside find
Pink jewelry box – TJ Maxx
Vintage silver stand – yard sale find
Vintage glove form – Ebay
Metal chair – family hand-me-down
Mirror – family hand-me-down
Shelf above mirror – Pottery Barn
Framed ceiling tins – vintage finds
In case you missed it, here are some previous posts highlighting other projects in my daughter’s bedroom redo:
Bulletin Board Project
Marble top night stand
Ceiling embellishment
Linking up to some of these parties
A few weeks back I mentioned my daughter’s bedroom had been scouted for a Better Homes and Gardens photo shoot. Sadly, her room was not chosen.
The good news, however, is now I am free to share pictures of the room and all the ideas I used to transform her space from a little girl’s bedroom into something a bit more grown-up. So over the next few weeks I will be highlighting various parts of her room and showing how to make some of the projects I used in the redo.
To give a frame of reference for this and upcoming posts, as well as the final room reveal, here is where I began. The color palette inspiration came from this beautiful linen fabric from Calico Corners.
Although I fell in love with this fabric the minute I saw it, my daughter needed a little convincing. Previously, her room had been green and blue – a Laura Ashley bedding ensemble left over from my college days over twenty years ago. Now, she wanted pink, pink and more pink. (I will be showing before pictures in a future post). After much discussion (and prodding) she gave me the OK and the room redo began.
Project #1 - Bulletin Board Makeover
This bulletin board was purchased from Ballard Designs many years ago. The off-white color no longer worked with the new color scheme and I really wanted to do something “different.” I started by painting the frame white and spraying with a semi-gloss varnish. It looked better but the board still needed some color.
My solution – add pink ribbon secured with silver push pins around the outside edge of the board.
Simply cut four pieces of ribbon approximately 1 ½ inches longer than the length of each side. Fold and press under (with iron) approximately ¾” of each unfinished edge. Place on bulletin board and secure with push pins in each corner.
Continue adding push pins – spacing evenly – around the edge.
So simple and very cute! Here is a close up (below) of the bulletin board hanging in her room. The second picture gives a wider view of the space and a bigger hint of what is to come!
Sources:
White shelf below the bulletin board – Target
Three vintage milk glass vases – Thrift store purchases
Upholstered and slip covered cubes – Target
Pink throw – Home Goods
Monogram pillow – available in my Etsy Shop
Chalkboard arrow – Favors by Lisa (from a giveaway I won)
In case you missed it, here are some previous posts highlighting other projects in my daughter’s bedroom redo:
Marble top night stand
Ceiling embellishment
Linking up to some of these parties
One of the most under decorated spaces in houses tends to be the ceiling. Unless you live in an older home blessed with beams, tin and/or ornate moldings, it is rare to see anything today beyond white paint and crown molding.
Being a “detail person,” I am always looking for simple and inexpensive ways to add character to my house. I find it is the little things that turn the ordinary into the extraordinary. So I wanted to share two ideas – three projects – that we did in our house to add charm to our ceilings.
#1 PAINT
Bathroom Ceiling
One of the unique things we did in our house is paint the master bathroom ceiling blue.
When we moved into our house, the bedding colors in our master bedroom were white, yellow, and blue. In an effort to make the two spaces – bedroom and bathroom - coordinate we decided to add a touch of blue to the bathroom.
Instead of adding the color to the walls, we painted the ceiling. I love how this keeps the room light and bright but still adds the color we wanted. Although we have recently changed our bedding colors to a more neutral palette, the blue ceiling still remains.
#2 MOLDING
Foyer ceiling
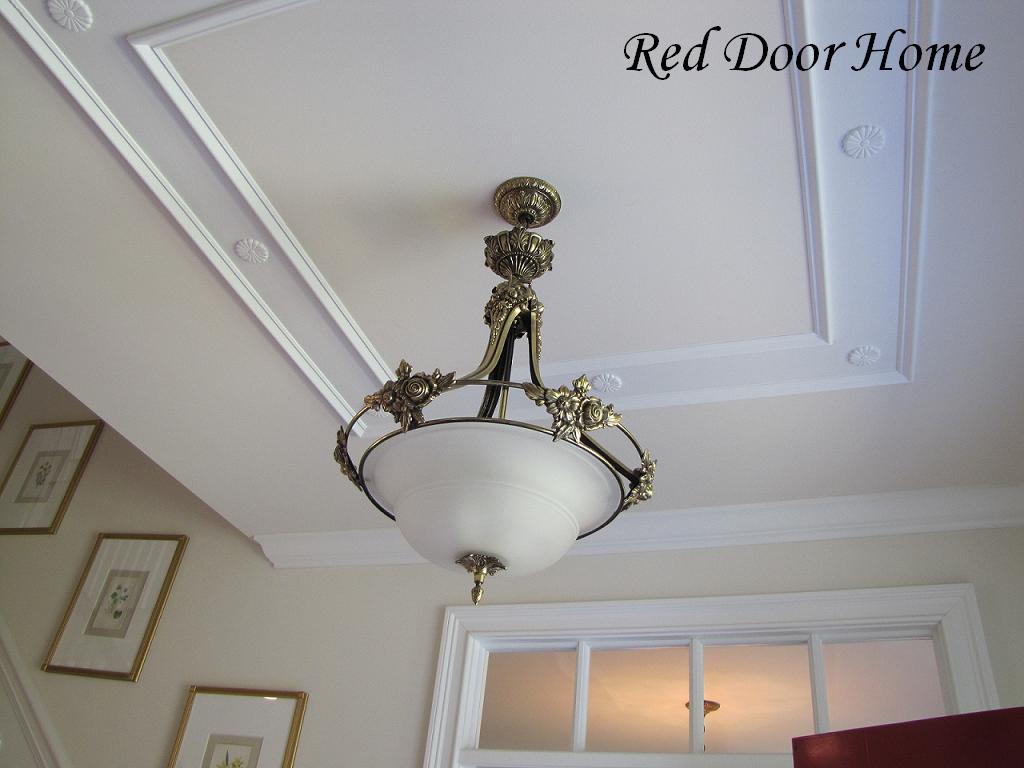
The foyer in my house is fairly small - big enough for a 4’ x 6’ rug but too small for any type of furnishings. To help delineate this space from the hallway and create a sense of separation, we framed our light fixture with simple stock molding and wooden embellishments.
My husband cut four 4’ boards for the outside molding and four 3’ boards for the inside molding to create two frames. After nailing the boards and rosettes in place, the nail holes were filled and the space between the boards was painted the same white semi gloss as the trim. The trickiest part of this project is getting the boards straight and centered exactly even around the light fixture.
I love how this small touch of molding gives the foyer a sense of distinction from the hallway and sets the tone for the rest of the house.
Bedroom ceiling
Because I loved how the foyer ceiling turned out, I convinced my husband to do something very similar in my daughter’s bedroom. She has a pretty crystal chandelier (before shown below) but I wanted to make it stand out even more.
This time we used two different types of molding – a larger width piece for the outside frame and a smaller width piece for the inside.
The process was the same as in the foyer – cut the wood, nail in place, fill holes and paint. Below is the molding in place but unpainted.
Here is it is all finished. You will notice this time we decided to leave the space between the frames blank - no rosettes.
I am very pleased with how all three of these projects turned out. I am hoping our next attempt at embellishing a ceiling will be in the dining room. I am trying to convince my husband we need (and can make) a coffered ceiling! Wish me luck.
Linking up to these parties
My most recent project in the painting department is this metal top coffee table.
A friend no longer had use for it and asked me if I wanted it. The answer took about negative 2 seconds – yes!
After bringing the table home and cleaning it up a bit I went back and forth between painting and leaving it unfinished. I tend to like a mix of finishes (paint and wood) in my house and liked the rustic nature of the table. In the end, however, the painting won out because of the space I planned to use it in.
After sanding, scraping, and cleaning, I taped up the top and the casters and got to work. I used my normal heirloom white spray paint and then finished with a glaze. The entire process took only a few hours.
Here is the finished table in its new home. Love it!
Note: You may recognize this space as my recently finished basement. The coffee table shown in the magazine photos (here and here) is really from upstairs in my living room. It was moved to the basement for the photo shoot. I am very happy to now have a table for the basement too!
linking up to these parties


 Posts
Posts