A little while back I shared a sneak peak of a coffee table
project I was about to begin using a new-to-me refinishing technique. I am happy to report it is complete and turned
out even better than I had hoped!


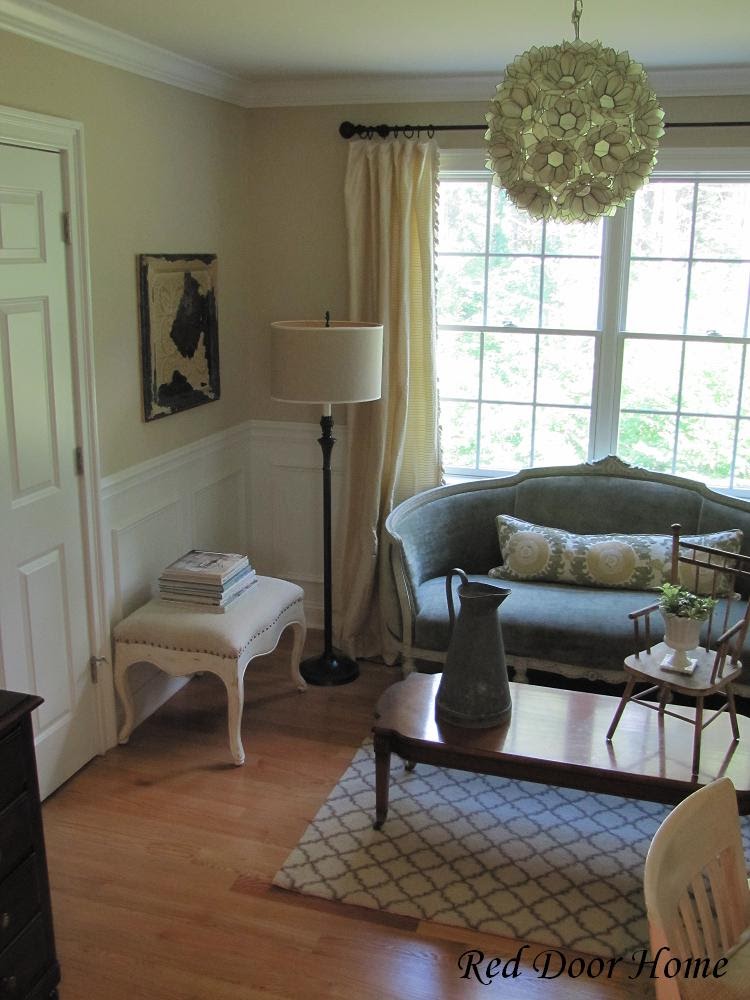
Above is what the table looks like today and below is a
picture of what the table looked like when I started. I loved the shape and scale of the table for
our office sitting area but it was very orange and too shiny.

My original refinishing plan was to use a furniture stripper
followed by sanding with a palm sander. My
plans changed, however, when I visited my local Lowes store. The salesperson I worked with just happened
to be a woodworker and suggested I try using acetone for removing the finish,
followed by a good hand sanding. The
acetone, he said, would remove all the inorganic elements (stain and varnish)
from the wood and by using a 00 grade of steel wool the table would require
only hand sanding to achieve a perfectly smooth finish. It sounded pretty simple so I decided to
give it a try.
After he explained the safety considerations when working
with acetone – it will burn your skin and eyes and is highly flammable and
should only be used in well ventilated (outside) areas away from any open flames
– we went around the store gathering up the supplies. I needed acetone, chemical safe gloves, a full
chemical face mask, 00 grade steel wool, fine grit sand paper and a small metal
bucket.
I began the project by removing the brass casters and decorations
from the table. The table was then placed outside on rocks (acetone will kill
grass) in the corner of our garden area on top of a layer of plastic and
newspapers. I tied my hair back, wore
long pants, a long sleeved shirt tucked into the chemical safe gloves and the
face mask to make sure I was fully protected.

Once I was ready to go, the project was fairly straight
forward. Simply pour about an inch or
two of acetone in the metal bucket, dip the steel wool into the acetone and
then start scrubbing with the grain of the wood. (Acetone will evaporate quickly so you only
want to pour a small amount in the bucket at a time.) Keep dipping the steel wool into the acetone
and scrubbing. When the steel wool
“wears out” grab a new piece and repeat the procedure until you are satisfied
with the results.
After all the finish was removed, I sprayed the table with water
using a garden hose and let it dry outside.
When the table was completely dry it was time for a hand sanding to even
out the grain of the wood and remove any residue.
It took about 3 hours for me to remove everything from the
wood using the acetone and steel wool plus more time for sanding. It was a lot
of work but the results were worth the effort.
The table was returned to the natural wood color and was extremely
smooth.


Since I wanted the table to have a light, slightly white
finish, I decided to try another first for me - Briwax liming wax. I could not find it locally so I ended up
ordering the wax online. I simply followed
the directions on the can and applied small amounts using a cotton cloth. I kept applying the wax until I had the look I
wanted. Once the wax was dry it was time
for a top coat of furniture wax. I used
a clear finish furniture paste wax by Minwax.


The table turned out wonderful! I also have to say liming wax has now been
added to my list of favorite products. I
have already used it on another project which I will be sharing shortly and
have found myself looking around my house to see what other wood pieces I can
use it on!
I am curious to know, have you ever tried using acetone
and/or liming wax? Were you happy with
the results? Looking forward to hearing
about your experiences!
Note: Please be sure
to read all the instructions and warnings on the acetone container and wax as
well as consulting with a salesperson to make sure you have all the proper
equipment to order complete this project safely.