Showing posts with label Gingerbread Houses. Show all posts

Monday, August 1, 2011

August RDH Blog of the Month – Velvet and Linen


Today I am thrilled and honored to be featuring Velvet and Linen as the August Red Door Home blog of the month!

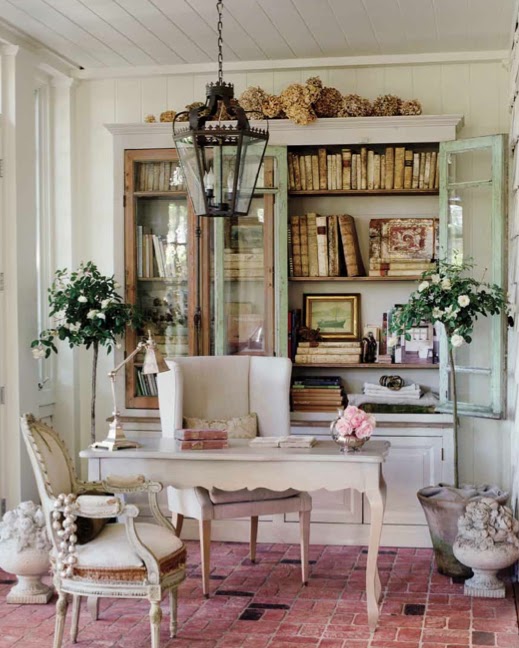
Velvet and Linen is written by Brooke Giannetti – a talented designer whose decorating style favors Belgian and Swedish antiques mixed with industrial and outdoor elements.  
via Velvet and Linen

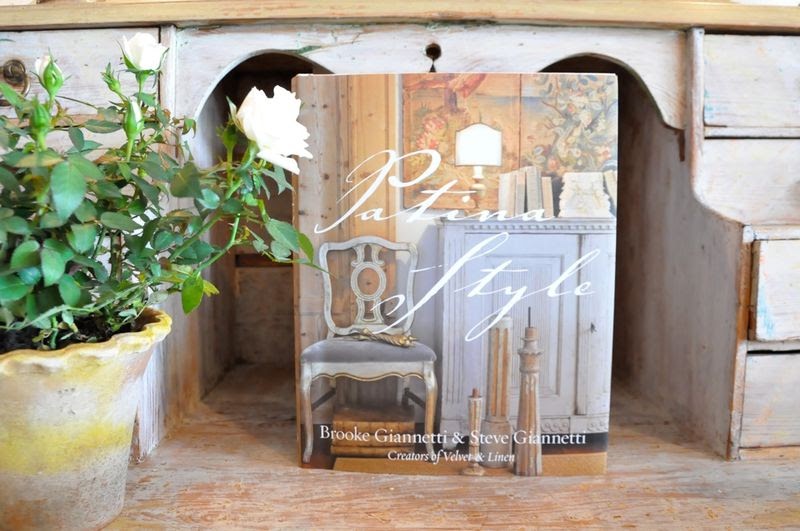
Her beautiful and unique aesthetic has been showcased in The New York Times, HGTV, numerous publications – including the most recent article in Veranda magazine – as well as in the just released book, Patina Style, she co-wrote with her husband, architect Steve Giannetti.
Pink Bathroom featured in The New York Times
Veranda photo featuring paintings by Steve Giannetti
The book features beautiful photographs and wonderfully written text which delve into the Giannettis’ philosophy of “life isn’t about the things you own but about the experiences you have with them.”
Patina Style introduction via Velvet and Linen
I read Patina Style from cover to cover and truly enjoyed learning about the various elements which define Patina Style as well as studying the fabulous pictures - discovering new design inspirations each time.  If you haven’t ordered your copy yet, I highly recommend you do.
via Velvet and Linen
One of the projects I am most looking forward to following on Velvet and Linen is the construction of the Giannettis’ new dream home, Patina Farm.  Not too long ago, Brooke and Steve purchased a piece of property in Ojai, California.  Brooke has graciously been sharing the process of this exciting venture including the house plans shown below and details of a recent trip she took to with her family Belgian.
Patina Farm drawing by Steve Giannetti

Model of Patina Farm
Besides all of the above, Brooke and Steve have also collaborated on many celebrated design projects, own a store called Giannetti Home, and design their own line of custom furniture.  Add in the fact Steve is an accomplished painter and you can see why this duo has gained such national attention in the design world.
Fifi Chair by Giannetti Home Furniture
Finally, I could not end this feature without mentioning the chickens.  I, along with many other Velvet and Linen followers, have been captivated by them ever since they arrived at the Giannettis’ home nearly six months ago.
via Velvet and Linen
The Giannettis created a chicken garden complete with the coop shown below to house the latest addition to their family.
via Velvet and Linen
Thank you, Brooke for allowing me to feature your wonderful blog.  I honestly think I could have devoted two or three more posts to Velvet and Linen and I still would not have been able to include all the honors and projects the Giannettis have received and completed.
Be sure to stop by Velvet and Linen to see more fabulous design inspiration!

Sunday, December 19, 2010

Gingerbread Houses


Baking and decorating gingerbread houses are two of my favorite holiday traditions. I don’t create anything elaborate or complex like the house pictured above. Rather, I use a kit purchased several years ago from Magic Cabin . . .


. . . which includes everything needed – recipes and cookie cutters – to make a simple ready-to-be-adorned house like the one shown below.


Here is a quick run through of the entire process.

To make the dough, melt 1 cup of white Crisco in a large pot over medium heat. Add 1 cup sugar and 1 cup of unsulfered molasses, stirring until sugar is completely melted.

In a separate bowl combine 5 cups flour, 1 tsp. salt, 1 tsp. baking soda, 1 tsp. nutmeg and 2 tsp. ginger. Remove pot from heat. Add 4 cups of the dry ingredients to molasses mixture. Stir with spoon until combined. Mix in last cup of dry ingredients with your hands.


Roll dough on a cookie sheet using a rolling pin or tall glass. Use the cookie cutters to make the appropriate number of pieces to construct the house.


Bake at 375 degrees for approximately 13 minutes or until light brown.

Cool completely. Don’t worry if your pieces are not perfect - icing can hide almost any imperfection

Assemble the house using the provided icing recipe or one of your own. I make an easy royal icing of 3 tablespoons meringue powder, 4 cups confectionary sugar and 6 tablespoons water.

 For the foundation I use inexpensive cookie trays from the Dollar Store and a white paper doily. Apply icing to all edges of the gingerbread house.


Let the icing harden before decorating.


To attach the candy use store bought icing. Making your own icing is also an option.


Be creative and have fun! The only limitation is your imagination.  (Above and below are pictures of the house I created this year.)


Notes: You may remember last year when I showcased gingerbread houses made by several of my friends. Sadly, this year time passed me by and I was not able to host my annual holiday gingerbread house decorating party. Hopefully next year I will get my act together sooner and revive this annual tradition. Also, the kit I use is no longer available through Magic Cabin but they do have several other options. Finally, I have never eaten the finished gingerbread, it smells delicious and several friends have said it does taste good. I concentrate all my nibbling on the candy!

I would love to hear about your experiences with gingerbread houses. Have you ever made a gingerbread house? Did you design your own or use a kit? What are your favorite candy decorations?

Thursday, December 10, 2009

Gingerbread House Decorating Party

One of my favorite holiday traditions is my annual gingerbread house decorating party. I make the houses and my friends bring the candy and icing for the decorating. We spend the afternoon talking, eating too much candy and decorating houses - peeking at each other's ideas along the way.

About two weeks before the party I bake the gingerbread house pieces. The weekend prior to the party I assemble the houses. The houses are made from a cookie cutter kit available at MagicCabin.com. The kit includes cookie cutters, directions, and recipes for the gingerbread and icing used to glue all the pieces together. I find making the houses in an assembly line fashion much quicker than making each house individually. For the base, I head to the dollar store and purchase small pizza pans which can be reused each year.

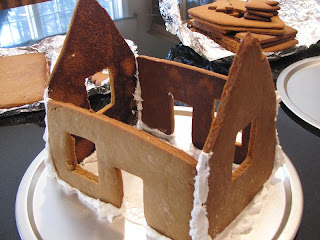
Below is a picture of the houses all assembled and waiting to be decorated. A little gingerbread house village. They are not perfect but once the houses are covered in candy, no one will notice!As everyone arrives, they put the candy they have purchased in the middle of the kitchen island. As you can see there was no shortage of candy here. To attach the candy, we use store bought icing.
Almost done.
And here are the finished houses. Even though we all started out with the same basic house each one turned out a little different. Each one as pretty as the next.

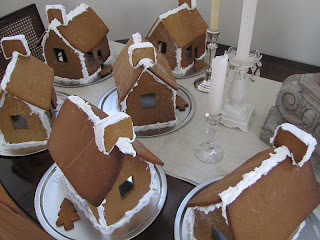
When it is time to go, all the houses are wrapped with cellophane and tied with a white ribbon. The big question at the end of the day is always "when are you going to eat it?" Most of my friends leave their houses wrapped until Christmas day. A fun family tradition my friends have started as a result of this party. Since I don't end up wrapping mine, it usually only lasts a few days before pieces of candy begin to go missing from my house. I will give you one guess as to who is the first to take a piece!
Blog Widget by LinkWithin