Tuesday, April 27, 2010

Bedroom Makeover Update and a Clever Way to Dress up a Bulletin Board

A few weeks back I mentioned my daughter’s bedroom had been scouted for a Better Homes and Gardens photo shoot. Sadly, her room was not chosen.

The good news, however, is now I am free to share pictures of the room and all the ideas I used to transform her space from a little girl’s bedroom into something a bit more grown-up. So over the next few weeks I will be highlighting various parts of her room and showing how to make some of the projects I used in the redo.

To give a frame of reference for this and upcoming posts, as well as the final room reveal, here is where I began. The color palette inspiration came from this beautiful linen fabric from Calico Corners.
Although I fell in love with this fabric the minute I saw it, my daughter needed a little convincing. Previously, her room had been green and blue – a Laura Ashley bedding ensemble left over from my college days over twenty years ago. Now, she wanted pink, pink and more pink. (I will be showing before pictures in a future post). After much discussion (and prodding) she gave me the OK and the room redo began.

Project #1 - Bulletin Board Makeover
This bulletin board was purchased from Ballard Designs many years ago. The off-white color no longer worked with the new color scheme and I really wanted to do something “different.” I started by painting the frame white and spraying with a semi-gloss varnish. It looked better but the board still needed some color.

My solution – add pink ribbon secured with silver push pins around the outside edge of the board.
Simply cut four pieces of ribbon approximately 1 ½ inches longer than the length of each side. Fold and press under (with iron) approximately ¾” of each unfinished edge. Place on bulletin board and secure with push pins in each corner.
Continue adding push pins – spacing evenly – around the edge.
So simple and very cute! Here is a close up (below) of the bulletin board hanging in her room. The second picture gives a wider view of the space and a bigger hint of what is to come!

Sources:
White shelf below the bulletin board – Target
Three vintage milk glass vases – Thrift store purchases
Upholstered and slip covered cubesTarget
Pink throw – Home Goods
Monogram pillow – available in my Etsy Shop
Chalkboard arrow – Favors by Lisa (from a giveaway I won)

In case you missed it, here are some previous posts highlighting other projects in my daughter’s bedroom redo:
Marble top night stand
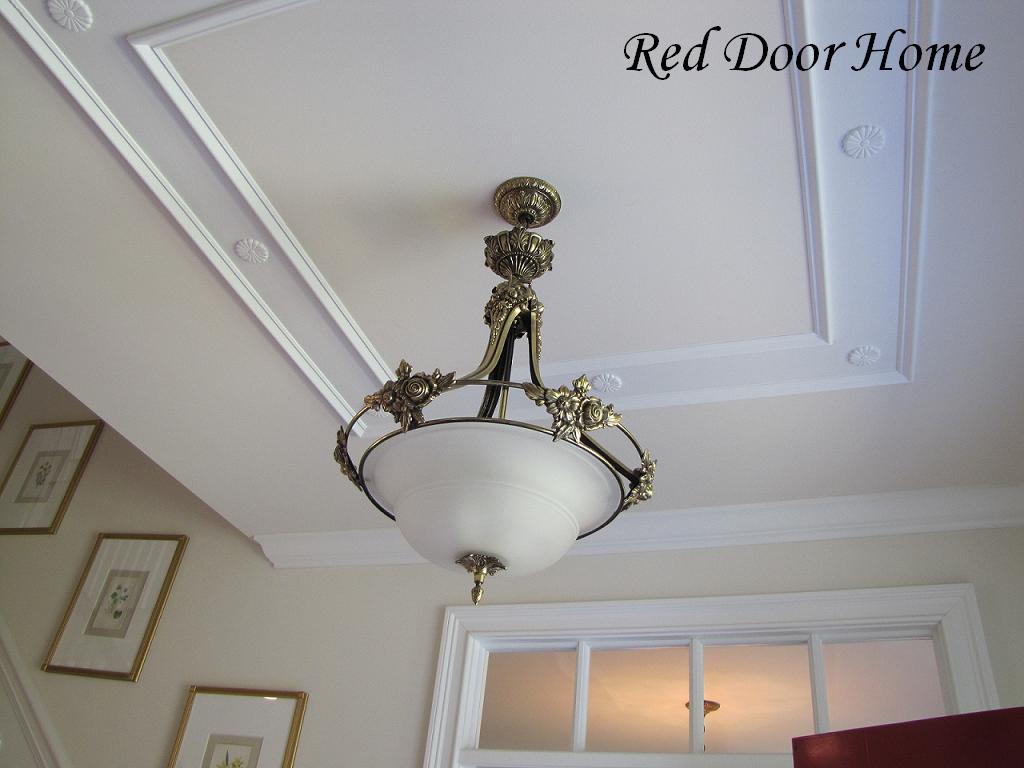
Ceiling embellishment

Linking up to some of these parties

Thursday, April 22, 2010

Two Simple Ideas to Add Character to Your Ceilings

One of the most under decorated spaces in houses tends to be the ceiling. Unless you live in an older home blessed with beams, tin and/or ornate moldings, it is rare to see anything today beyond white paint and crown molding.

Being a “detail person,” I am always looking for simple and inexpensive ways to add character to my house. I find it is the little things that turn the ordinary into the extraordinary. So I wanted to share two ideas – three projects – that we did in our house to add charm to our ceilings.

#1 PAINT
Bathroom Ceiling
One of the unique things we did in our house is paint the master bathroom ceiling blue.
When we moved into our house, the bedding colors in our master bedroom were white, yellow, and blue. In an effort to make the two spaces – bedroom and bathroom - coordinate we decided to add a touch of blue to the bathroom.
Instead of adding the color to the walls, we painted the ceiling. I love how this keeps the room light and bright but still adds the color we wanted. Although we have recently changed our bedding colors to a more neutral palette, the blue ceiling still remains.


#2 MOLDING
Foyer ceiling
The foyer in my house is fairly small - big enough for a 4’ x 6’ rug but too small for any type of furnishings. To help delineate this space from the hallway and create a sense of separation, we framed our light fixture with simple stock molding and wooden embellishments.
My husband cut four 4’ boards for the outside molding and four 3’ boards for the inside molding to create two frames. After nailing the boards and rosettes in place, the nail holes were filled and the space between the boards was painted the same white semi gloss as the trim. The trickiest part of this project is getting the boards straight and centered exactly even around the light fixture.
I love how this small touch of molding gives the foyer a sense of distinction from the hallway and sets the tone for the rest of the house.

Bedroom ceiling
Because I loved how the foyer ceiling turned out, I convinced my husband to do something very similar in my daughter’s bedroom. She has a pretty crystal chandelier (before shown below) but I wanted to make it stand out even more.
This time we used two different types of molding – a larger width piece for the outside frame and a smaller width piece for the inside.
The process was the same as in the foyer – cut the wood, nail in place, fill holes and paint. Below is the molding in place but unpainted.
Here is it is all finished. You will notice this time we decided to leave the space between the frames blank - no rosettes.


I am very pleased with how all three of these projects turned out. I am hoping our next attempt at embellishing a ceiling will be in the dining room. I am trying to convince my husband we need (and can make) a coffered ceiling! Wish me luck.

Linking up to these parties

Monday, April 12, 2010

Metal Top Table Redo

My most recent project in the painting department is this metal top coffee table.
A friend no longer had use for it and asked me if I wanted it. The answer took about negative 2 seconds – yes!
After bringing the table home and cleaning it up a bit I went back and forth between painting and leaving it unfinished. I tend to like a mix of finishes (paint and wood) in my house and liked the rustic nature of the table. In the end, however, the painting won out because of the space I planned to use it in.
After sanding, scraping, and cleaning, I taped up the top and the casters and got to work. I used my normal heirloom white spray paint and then finished with a glaze. The entire process took only a few hours.
Here is the finished table in its new home.  Love it!
Note: You may recognize this space as my recently finished basement.  The coffee table shown in the magazine photos (here and here) is really from upstairs in my living room. It was moved to the basement for the photo shoot. I am very happy to now have a table for the basement too!

linking up to these parties

Saturday, April 10, 2010

No Man Cave Here!

I was at the bookstore today flipping through magazines (a favorite hobby of mine) and came across a picture of my basement sitting area in the Spring/Summer 2010 edition of Better Homes and Gardens 100 Ideas – Real Rooms.


There have been several pictures of this space - which was originally shown back in the July 2009 edition of Better Homes and Gardens – in various BH&G publications (here and here). My basement was chosen this time as an example of “Finishing Points.”

100 Ideas Real Rooms / Photographer - John Bessler
Stylist - Donna Talley, Regional Editor and Producer for Meredith Publications

The caption reads - “Forget the traditional man cave filled with plump leather furniture – a basement can look light, feminine, and tailored. Here, bead-board walls, fresh window trim, and columns hiding unsightly steel posts create a crisp backdrop that’s teeming with architectural character.”

Friday, April 9, 2010

Words of Gratitude

These past few weeks have been filled with so many blessings. Red Door Home has been featured on several incredible blogs, I did my first guest blog tutorial, was lucky enough to win three giveaways, and many people have signed up as new followers. I wanted to pass along a big thank you to everyone!
You may have noticed several new buttons along the left hand side bar showing all the places Red Door Home tutorials and projects have been featured. The list includes Steph at Somewhat Simple, Jen at Tatertots and Jello, Fawnda and Jeannine at Fireflies and Jellybeans, Roeshel at The DIY Showoff, Lindsey at Better After, Kim at Today’s Creative Blog, Rachel at One Pretty Thing, and Cassity at Remodelaholic. Thank you all!

A special thank you also goes to Kari at U Create. Kari was nice enough to contact me about doing a guest post on U Create featuring my Vintage Block Printing Projects. I highly recommend a visit to each of these wonderful blogs. They are full of incredible craft, decorating and DIY ideas.

Next, I wanted to thank Gina at The Shabby Chic Cottage for hosting her Spring Fling day of giveaways. I was the fortunate winner of an original Laryssa Herbert water color.
I just received it yesterday and can’t wait to frame this pretty picture. I plan on hanging it in my office. Also, from The Shabby Chic Cottage, I won this cute chalkboard arrow sign from Favors By Lisa.
Thanks also go to Jeanette at JVW Home for this cute t-shirt.
Jeanette is an interior designer in Texas and she has recently designed a nursery which included my Gray Velvet Flowers Pillow. Here is a sneak peak.
Finally, I wanted to thank everyone who has chosen to follow Red Door Home. I appreciate each and every one of you.  I am amazed everyday by the inspiring comments you leave and the personal stories you tell. 

Monday, April 5, 2010

My Three Secrets to Finding Roadside Treasures

Many of you have been amazed by what I have found by the side of the road. In all honesty, so have I. You have asked me where I live, why people put things on the street, and if you could come along with me in my car! You may be surprised to learn the three biggest secrets to my success in finding freebies.

#1 - I am a runner.
I still run but I used to be a very serious and dedicated runner. It was not uncommon for me to run twice a day – morning and afternoon. I am up early - about the time most people haul their “trash” to the curb – allowing me the first look at what is being thrown away. I guess the early runner gets the finds! A second benefit of being a runner is it gives you a different perspective than driving around in a car. When you run, you are more apt to slow down and take a closer look. You see things when you run that you don’t when you drive. Third, when you run, you tend to take the road less traveled. I run in small neighborhoods, down side streets, and not on busy roads. All the places I am more likely to find things.

Running, however, is not without its challenges. How to get things home? Most things I will just carry while I run (really). My husband always jokes – what did you bring home now? There are times, however, when I am many, many miles from home. What to do? Why hide the stuff in the bushes of course! (I do have to admit remembering myself doing this made me giggle!) Seriously, I have hid quite a few things after finding them so no one else would take them. I simply return with the car after I complete my run.


#2 - I have lived in college towns.
Many of my best finds occurred while living in college towns. You see, twice a year students move out of their rented houses. They take what they can fit in their cars and the rest is left on the street for the garbage people (or early bird runners) to haul away. A lot of what college students use for furnishings are hand-me-downs or old things no one else in the family wants any more (translation = vintage!)

#3 - I am not bashful about looking in other people’s trash.
First a disclaimer – I am not a dumpster diver! I don’t set out to find things. I will, however, stop and take a closer look if I see something that looks interesting. When I put things out by the side of the road, I would much rather someone take it and use it then have it end up in the landfill. I guess I assume the same is true of other people who put things by the side of the road.

I do have a few other finds to share that I forgot to include in my first post. The first is a pretty pewter pitcher.
Another great and favorite find (one of my very first many years ago) is this large wooden window frame. I took out the glass and made it into a mirror. It now hangs in our upstairs hallway.

Finally, I found this great desk chair. It is oak and was missing one caster when it was found. I bought new casters and painted and glazed it to match my desk.

So now you know why I have been so successful. In truth, though, it has mostly been due to luck. I would love to hear what you have found and the secrets to your success! 

Today's Thrifty Treasure at Southern Hospitality
Nifty Thrifty Tuesday at Coastal Charm
Get Your Craft On at Today's Creative Blog
Whatever Goes Wednesday at Someday Crafts
Spotlight Yourself at Its So Very Cheri
Idea Sharing Wednesday at Women Who Do It All
Transformation Thursday at The Shabby Chic Cottage
Feature Yourself Friday at Fingerprints On the Fridge
Favorite Things Friday at A few of My Favorite Things
Frugal Friday at The Shabby Nest
Weekend Wrap Up Party at Tatertots and Jello

Thursday, April 1, 2010

A Simple Solution

I love to add a touch of spring to my house this time of year with pretty potted bulbs. Many times, however, they end up looking like this. . .

. . . and this.
Here is a simple, stylish, and inexpensive fix. Use silver plated spoons and forks from the thrift store as stakes. I purchased mine for only ten cents each!


I inserted the utensil end into the dirt and secured the plant with raffia to the fork or spoon. Now my plants look like this!

A great solution for only forty cents! For more great budget decorating ideas be sure to check out the decorating section of Red Door Home.

Frugalicious Friday at Finding Fabulous
Show and Tell Friday at My Romantic Home
Feature Yourself Friday at Fingerprints on the Fridge
Inspired By at The Inspired Room
Frugal Friday at the Shabby Nest
Simply Designing Link Party
Weekend Wrap Up Party at TaterTots and Jello
Blog Widget by LinkWithin