100 Decorating Ideas Under $100 / Photographer – John Bessler
Stylist - Donna Talley, Regional Editor and Producer for Meredith Publications
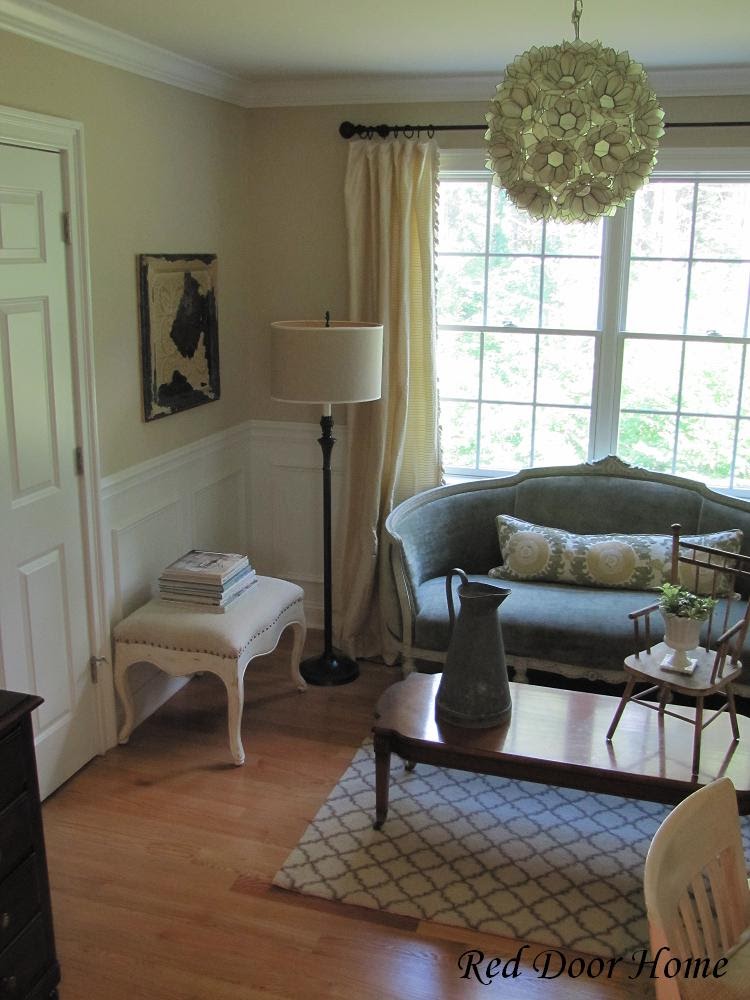
The curtains shown below were designed by Donna Talley (Regional Editor and Producer for Meredith Publications) and made by me. Both curtains are fashioned from a basic tab-top cotton panel available from Country Curtains. They, along with several other curtain designs, are featured in this month’s edition of Better Homes and Gardens 100 Decorating Ideas Under $100.

Although there are basic directions printed in the magazine, I wanted share in greater detail how these curtains were made. Because this turned out to be a rather long post, I have decided to divide it into two posts. Here is part one.
Top It Off
I created this valance using a piece of Amy Butler fabric. The biggest “tricks” to this technique are making sure your pattern is centered across the width of the curtain panel and using a fabric with a fairly large pattern.

100 Decorating Ideas Under $100 / Photographer – John Bessler
Stylist - Donna Talley, Regional Editor and Producer for Meredith Publications
Making the fabric topper directions:
Fabric width:
Measure the finished width of your pre-made curtain panel and add 4 inches.
Fabric height:
Based on the pattern of the fabric you are using, determine where you would like your finished top and bottom edges to be. Add 2 inches to the top finished edge. Add ½ inch to the bottom edge of your fabric using the fabric pattern as your guide.
Cut fabric to measurements above. For the fabric width, determine the center of your fabric pattern and measure out from the center mark.
Press top and side edges under 2 inches and then press raw edges under 1 inch to form a 1” hem. Carefully press bottom edge under ½” along fabric pattern edge. (Note: It is much simpler to use a large pattern.)
Pin fabric topper to pre-made curtain panel. The top edge should be lined up with the top of the curtain panel, directly below the tabs. The side hems should wrap around the edges of the pre-made panel. Sew in place along all four edges.
Stripe It Rich
The curtain shown below is the perfect solution for adding length to an existing curtain panel. I started again with the same basic panel from Country Curtains and added two panels of pretty turquoise linen fabric.

100 Decorating Ideas Under $100 / Photographer – John Bessler
Stylist - Donna Talley, Regional Editor and Producer for Meredith Publications
Directions:
Fabric height:
Determine the desired finished length of your curtain. Calculate the finished length of the two blue panels and one white panel, by using the following formula:
Finished curtain length minus the length of the tabs and curtain header, divided by three plus seam allowances (the seam allowance number will be not be the same for each panel)
The seam allowance for the top blue panel and middle white panel will both be 1”. The seam allowance for the bottom blue panel will be ½ inch plus 6 inches for the bottom hem.
Fabric width:
Measure the width of the curtain panel, including the side hem allowances.
Once all measurements have been calculated it is time to cut the pre-made curtain. Cut the pre-made curtain panel ½ inch below the tab top curtain header to allow for a seam allowance. Then cut one white panel from the pre-made curtain using calculated measurements. Cut blue panels from linen fabric using calculated measurements.
Assembling the Curtain:
To attach the three panels and tab top, you will need to take apart a few inches of the existing hem of the pre-made curtain on each side. With right sides together, pin and sew top blue panel and the tab top panel together using ½ inch seam allowance. With right sides together, pin and sew white panel to top blue panel using ½ inch seam allowance. With right sides together, pin and sew bottom blue panel to white panel.
Make bottom hem by pressing under 6 inches to wrong side of curtain. Press raw edge towards seam to form a 3 inch hem. Sew.
Finishing side seams:
Press under side seams (same technique as above) to match the existing seams from the pre-made curtain. Sew side seams by hand for a finished
As you can see, both of these ideas are simple, stylish and easily doable. Next up will be directions for creating a curtain using an embroidered table runner, as well as many more inspiring ideas for embellishing pre-made curtain panels.