


 I admit I am not one to decorate for every holiday, season, occasion, etc. A few pumpkins (preferably of the white and green variety) for Halloween, a fresh bouquet of white tulips for Easter and I am pretty much set. Christmas, however, is a different story.
 Like many people, some of my most wonderful childhood and adult memories are of my family's Christmas traditions. My Mom baked wonderful Norwegian cookies, my grandmother cooked a full course Italian dinner {which took hours to eat} and our entire house was decorated with love. Each ornament on our tree held a memory - a place visited or lived, a childhood school project, a favorite past time or sport, a gift from a cherished friend.
Traditions tie us to the past and help us to remember from where we come. As a Mom, I want to pass these same feelings on to my children. Which is why I make the effort to decorate my home during Christmas. It is the time we spend together as a family that means the most. So over the next few weeks I would like to invite you into my home to share some of my favorite decorating projects.
 This week's post features my mantel (seen above) and a simple table top decoration. For several years I have wanted to hang a wreath on a garden gate above my fireplace. I had seen pictures of this done before but had never been able to locate a gate until last week. I am so pleased with how it looks and I am trying to figure out how I can have the gate there all year!
 I also made stockings out of white burlap, linen and muslin, with raffia hangers. The round fabric embellishments are called "yo-yo's" and have been used in quilting circles forever. If you can sew, making stockings are a simple and quick project.
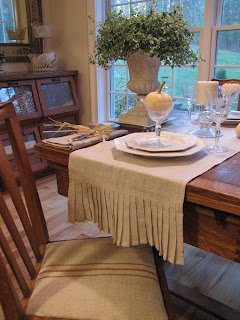
 The second item today is a "peppermint candy stand." Many people have some sort of wire stand in their house similar to mine. I simply outfitted it with a few clear bubble glasses, ornaments, greenery and candy.
 My kids love this during the holidays as it is the only time of year I have candy out and on display in my house. They find it fun to sneak a piece while they think I am not looking! (another great memory) I have used this as a centerpiece on my island as well as part of Christmas party dessert table.
 Supplies:
 Instructions:
 Fill tea cup to bottom of bulb with a mixture of 10 parts water to one part rubbing alcohol. The rubbing alcohol will keep the paper white from growing too tall. Place in a sunny location until ready to give. Note - you will have to monitor the water level of your tea cups almost daily.
 When ready to attend a party, simply wrap your tea cup with clear


 This was such a fun project. I will definitely give it another try again some time soon. Please let me know if you have designed a tablescape. I so enjoy seeing the creativity of others.

 Notice the hand painted plate above the door used for the street number.
  Instead of using a traditional wreath, Christi choose an elongated basket filled with fresh greens and accented with a silver glittered "G."

 Once inside, there are numerous displays to spark your imagination and creativity.
  When Christi first opened her store, it occupied one store front.


 Christi's husband also built this wonderful built-in to showcase many of the beautiful items available in the store.


