 I admit I am not one to decorate for every holiday, season, occasion, etc. A few pumpkins (preferably of the white and green variety) for Halloween, a fresh bouquet of white tulips for Easter and I am pretty much set. Christmas, however, is a different story.
Like many people, some of my most wonderful childhood and adult memories are of my family's Christmas traditions. My Mom baked wonderful Norwegian cookies, my grandmother cooked a full course Italian dinner {which took hours to eat} and our entire house was decorated with love. Each ornament on our tree held a memory - a place visited or lived, a childhood school project, a favorite past time or sport, a gift from a cherished friend.
Traditions tie us to the past and help us to remember from where we come. As a Mom, I want to pass these same feelings on to my children. Which is why I make the effort to decorate my home during Christmas. It is the time we spend together as a family that means the most. So over the next few weeks I would like to invite you into my home to share some of my favorite decorating projects.
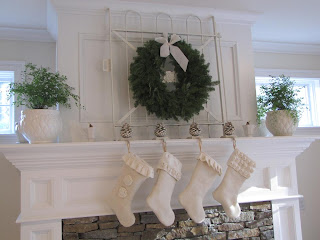
 This week's post features my mantel (seen above) and a simple table top decoration. For several years I have wanted to hang a wreath on a garden gate above my fireplace. I had seen pictures of this done before but had never been able to locate a gate until last week. I am so pleased with how it looks and I am trying to figure out how I can have the gate there all year!
 I also made stockings out of white burlap, linen and muslin, with raffia hangers. The round fabric embellishments are called "yo-yo's" and have been used in quilting circles forever. If you can sew, making stockings are a simple and quick project.
 The second item today is a "peppermint candy stand." Many people have some sort of wire stand in their house similar to mine. I simply outfitted it with a few clear bubble glasses, ornaments, greenery and candy.


 Posts


 ... my own "Charlie Brown" Christmas tree. I placed it in a vintage white McCoy pot and anchored the tree with small gravel from our garden. The pot was then placed in a vintage wagon which usually holds either a large plant or a variety of blankets and books during the rest of the year.
 The branches are few and far between so I kept the decorations simple and to a minimum - glass balls from Target and stars I made from left over feed sacks fabric pieces.


 To make the star ornaments print a picture of a star off your computer. (I made two different sizes.) Pin the wrong sides together, inserting a raffia loop on the top. Sew around the edges by hand or with a sewing machine, leaving a small opening for stuffing. (I used a sewing machine and sewed around the outside twice to prevent fraying.) Stuff the star lightly and sew closed. Embellish as you wish or leave plain.


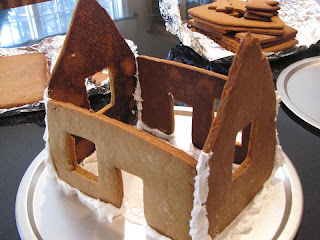 Below is a picture of the houses all assembled and waiting to be decorated. A little gingerbread house village. They are not perfect but once the houses are covered in candy, no one will notice!
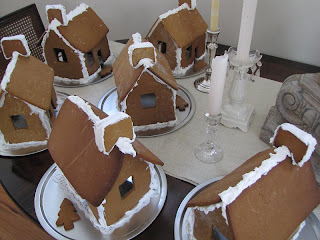


 When it is time to go, all the houses are wrapped with cellophane and tied with a white ribbon.


 Although I am quite sure this is not a new idea, I use white ribbons to hang the wreaths on the outside of my house instead of the traditional red. I love the way they look against the gray siding and the red door. They also give everyone who drives by a hint of what lies inside . . .


 I also hang a wreath on an inside door leading into my "red" room. The stand in the left hand corner is really a tall candle holder that I have filled with pine cones, greenery and a twig wreath. The oak door with glass insert and copper handle is part of a pair that my husband found while we were building our house. We were so pleased that our builder was able to install these instead of the new paned glass doors we had originally planned.

 The simple theme
 Here I filled an a white ironstone sugar bowl with greenery and a snowman ornament.


